Thursday, November 8, 2018

WEEK 33: CHAPTER 5: CONCLUSIONS AND RECOMMENDATIONS

OBJECTIVE
  1. To write a complete thesis of conclusions and recommendations for FYP 2.
METHODOLOGY
  1. Discuss with supervisor on how to write conclusions and recommendations for FYP.
  2. Follow the FYP report template given by the UniKL to help writing conclusions and recommendations.
  3. Write the overall conclusions for my FYP.
  4. Give a recommendations regarding improvement that can be made for my FYP.
  5. Produce a complete conclusions and recommendations thesis.
RESULT

The figures below are the complete conclusions and recommendations after discussed with my supervisor.

CONCLUSIONS AND RECOMMENDATIONS

ANALYSIS/DISCUSSION

Chapter 5 is the overall conclusions for the prototype quadruped robot. Chapter 5 also contains the recommendations in order to improve the quadruped robot. This is the complete chapter 5: Conclusions and Recommendations after discussed and approved by my supervisor, Sir Zaki.

CONCLUSION


In conclusion, this week objective was achieved. Chapter 5 is to shows to the readers the overall conclusions and also to give the readers suggestions to improve the quadruped robot to achieve its purpose as a search and rescue robot. 

Friday, November 2, 2018

WEEK 32: CHAPTER 4: RESULTS AND DISCUSSIONS

OBJECTIVE
  1. To write a complete thesis of results and discussions for FYP 2.
METHODOLOGY
  1. Discuss with supervisor on how to write results and discussion for FYP.
  2. Follow the FYP report template given by the UniKL to help writing results and discussions.
  3. Gather every results obtain from the quadruped robot prototype.
  4. Write an understandable discussions of my FYP.
  5. Produce a complete results and discussions thesis.
RESULT

The figures below are the complete results and discussions after discussed with my supervisor.


RESULTS AND DISCUSSIONS

ANALYSIS/DISCUSSION

Chapter 4 is produce after gathering all the data from the prototype quadruped robot. This is the complete chapter 4: Results and Discussions after discussed and approved by my supervisor, Sir Zaki.

CONCLUSION


In conclusion, this week objective was achieved. Chapter 4 is to shows to the readers the results that obtained from the quadruped robot prototype and the discussions of an the explanation regarding the hardware and software results. 

Thursday, October 25, 2018

WEEK 31: EXHIBITION DAY

OBJECTIVE
  1. To present my quadruped robot prototype on the Exhibition day.
  2. To explain my project based on the presentation poster.
METHODOLOGY
  1. Going to the UniKL BMI Gemilang Hall before 9 am on Wednesday, October 24th.
  2. Register for presentation.
  3. Set up the poster and quadruped robot prototype.
  4. Present the project to the assessors with confident.
RESULT

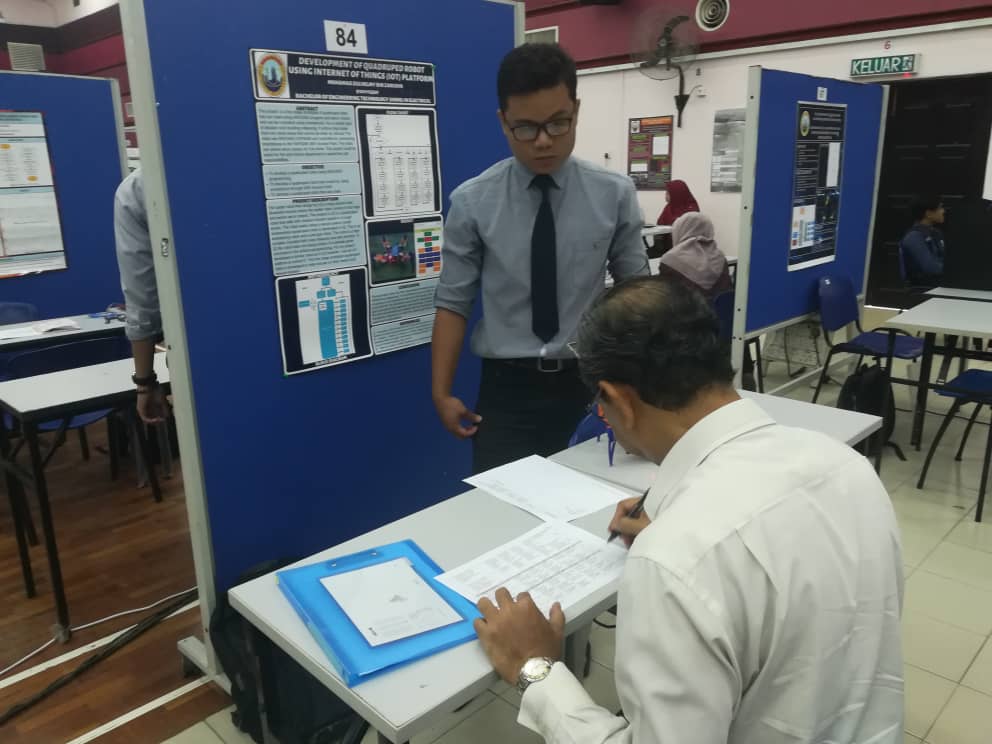
The following pictures are taken on the final year project 2 Exhibition day. 


ANALYSIS/DISCUSSION

The presentation going well. There are no problem with the project. The quadruped robot works perfectly. The assessors are satisfied with the presentation. After presenting to the assessors, I do some explanation and demonstration to the other students that interested with my project. I finish assessed at 10 am. The Exhibition day ends at 12 afternoon.

CONCLUSION

In conclusion, both of the assessors which was Professor Dr. Badri and a research engineer from UNITEN was satisfied with my presentation. The quadruped robot works perfectly without any problem. Thus, the presentation was going as planned.

Friday, October 19, 2018

WEEK 30: DESIGN POSTER AND PRESENTATION PREPARATION

OBJECTIVE
  1. To design a poster for presentation day.
  2. To do final preparation before the Exhibition day.
METHODOLOGY
  1. Design the poster using https://www.canva.com.
  2. Meet supervisor to ask for advice on doing presentation poster.
  3. Showing supervisor soft copy of poster before printing.
  4. Updating the poster according to supervisor.
  5. Print out the presentation poster.
RESULT

The presentation poster as figure below.

Presentation Poster

ANALYSIS/DISCUSSION

The poster is design using https://www.canva.com. The contents of the poster is written based on Sir Zaki wanted. After finishing the first copy of the poster, I consult Sir Zaki to as for his opinion on the poster. Then, he wanted me to do some correction. Hence, before print out the poster I consulted Sir Zaki again to see if there is any correction have to be made. The poster is print out after Sir Zaki is satisfied.

CONCLUSION

In conclusion, the presentation poster for the Exhibition day is print out. The quadruped robot prototype is fully charged and ready to present.

Monday, October 8, 2018

WEEK 29: PROTOTYPE TESTING AND TROUBLESHOOTING

OBJECTIVE
  1. To test the prototype quadruped robot.
  2. To troubleshoot the prototype quadruped robot.
METHODOLOGY
  1. Test the robot WiFi access point connection to the smartphone and laptop.
  2. Test the robot movement functionality.
  3. Troubleshoot if there is any problem countered.
RESULT

The following video is a video of testing the robot movement functionality.

Prototype limb movement testing controlling using laptop

After connecting the Wemos D1 Mini WiFi access point using laptop. The ESP8266 IP address is open through internet browser. The address are '192.168.4.1'. The quadruped controller showed up for me to control the robot.

After that, I tested the robot to walk. Eventually, the robot's leg is very slippery thus i put some glue using hot glue gun to the point of the legs to reduce it's slippery. 

Hot glue gun is used to put some glue on the end of the legs to reduce the slippery problem

After finishing putting glue on each legs of the robot. The quadruped robot is tested again. The following video show the steps to control the robot using smartphone.


Quadruped Robot walk testing

CONCLUSION

In conclusion, the robot has achieve its fully functional capability. This prototype quadruped robot is completed.

Saturday, October 6, 2018

WEEK 28: BUILD PROTOTYPE

OBJECTIVE
  1. To assemble the electronic components.
  2. To assemble the 3D printing body parts.
  3. To build the quadruped robot prototype.
METHODOLOGY
  1. Uploading the coding to Wemos D1 Mini and ARDUINO Pro Mini.
  2. Assemble the Wemos D1 Mini, ARDUINO Pro Mini and PCA 9685.
  3. Assemble the 3D printing body parts with servo motors.
  4. Connecting the servo motors to the PCA 9685 according to the port declared in the coding.
  5. Soldering the positive and negative of Li-Poly battery to the switch and DC-DC step down converter and UBEC voltage converter.
  6. Connecting the DC-DC step down converter to the Wemos D1 Mini, ARDUINO Pro Mini and PCA 9685.
  7. Connecting the UBEC voltage converter to all the servo motors.
  8. Tighten the screw and glue the components to the robot to complete build the quadruped robot.
RESULT

As a result, the following pictures are the process of assembling the quadruped robot prototype.

Assembling each leg parts with two servo motors

Screwing four servo motors to the body part

Complete assemble of 3D printing body parts with Servo motors

Complete connection of the electronic components, Li-Poly battery and the robot body

ANALYSIS/DISCUSSION

The arduino and Wemos D1 Mini was uploaded with the coding before connecting to each other and other components to avoid error from the board. The servo horn has some difficulty put because of the 3D printing leg parts has small space to put the servo horn. Hence, the servo horn is tighten to the leg using cable tie. The body of the robot has small space, it can only fit with Wemos D1 Mini, ARDUINO Pro Mini and also PCA9685. The UBEC and DC-DC step down converter was place on top of the robot, glued along with the Li-Poly battery. 

CONCLUSION

As a conclusion, the quadruped robot prototype was finish assemble and the robot is ready to be test.

Wednesday, September 26, 2018

WEEK 27: BUYING ADDITION COMPONENTS

OBJECTIVE
  1. To decide what type of components that suitable to develop my new design project.
  2. To search electronic store that sells the components that needed with a reasonable price.
METHODOLOGY
  1. Understanding the steps taken to build the quadruped robot on https://www.instructables.com/id/ESP8266-WIFI-AP-Controlled-Quadruped-Robot/
  2. Comparing the design to my 3D printed body parts and decide what components suitable for my project.
  3. Listing the addition components that need to buy.
  4. Searching the electronic store on Jalan Pasar, Pudu, Kuala Lumpur.
  5. Buying the components.
RESULT

As a result, I found one electronic store near Jalan Pasar, Pudu, KL that offer all the components needed to build my project. The named of the store is 'Online Components Sdn Bhd'. 

Online Components Sdn Bhd near Jalan Pasar

The addition components that I've bought on this store is:

WeMos D1 Mini

PCA9685 16-Channel 12-bit PWM Servo Motor Driver

Hobbywing UBEC 5V or 6V switchable max 3A

Mini DC-DC Step Down Converter

Li-Poly RC Battery 7.4V 2200mAh

Boat Button Switch

ANALYSIS/DISCUSSION

The store provide me all the addition components required for me to build my prototype. The reason why I choose these components is because: 

WeMos D1 Mini: This is the same type as NodeMCU dev kit. it has ESP8266 WiFi module but this component is a lot smaller than nodeMCU. I choose this component because of it small size so that it is fit to my robot since my robot is small. It also has less pin however, I only use 4 pins for my project. thus, less pin does not give problem to build my prototype.

PCA9685 16-Channel 12-bit PWM: This component is recommended from the project that I found in the internet. it can give addition of PWM pin to my arduino Pro Mini. This board is powered using 5V power and very useful for building a robot or proect that use many PWM servo motor.

UBEC 5V or 6V switchable max 3A: This component works as voltage regulator to 5V of 6V similar to DC to DC voltage regulator. However, it has filtering so it will reduce noise that can affected the motor glitch and it has high ampere that's enough to lift up the robot load.

Mini DC to DC Step-Down Converter: The mini DC to DC step-down converter is to regulate power from source to 5V which then can supply to the components that powered up with 5V. It has no filtering so, for this project I will not powering up servo motors with this component.

Li-Poly RC Battery: This LiPo is the main power source for my robot. It gives 7.4V power to connect to the UBEC and DC to DC step-down.

Boat Switch Button: For safety issues and power saving consumption, I will make a power switch from the LiPo using the Boat switch button since the LiPo doesn't have switch button.

CONCLUSION

In conclusion, the components to build this project have already been bought. All the components are bought with a reasonable price. Thus, I can continue to developing the quadruped robot using the addition components.

WEEK 34: COMPLETING PROJECT THESIS

OBJECTIVE To do corrections for chapter 1, 2 and 3. To compile all chapters. To complete the project thesis. METHODOLOGY Correc...